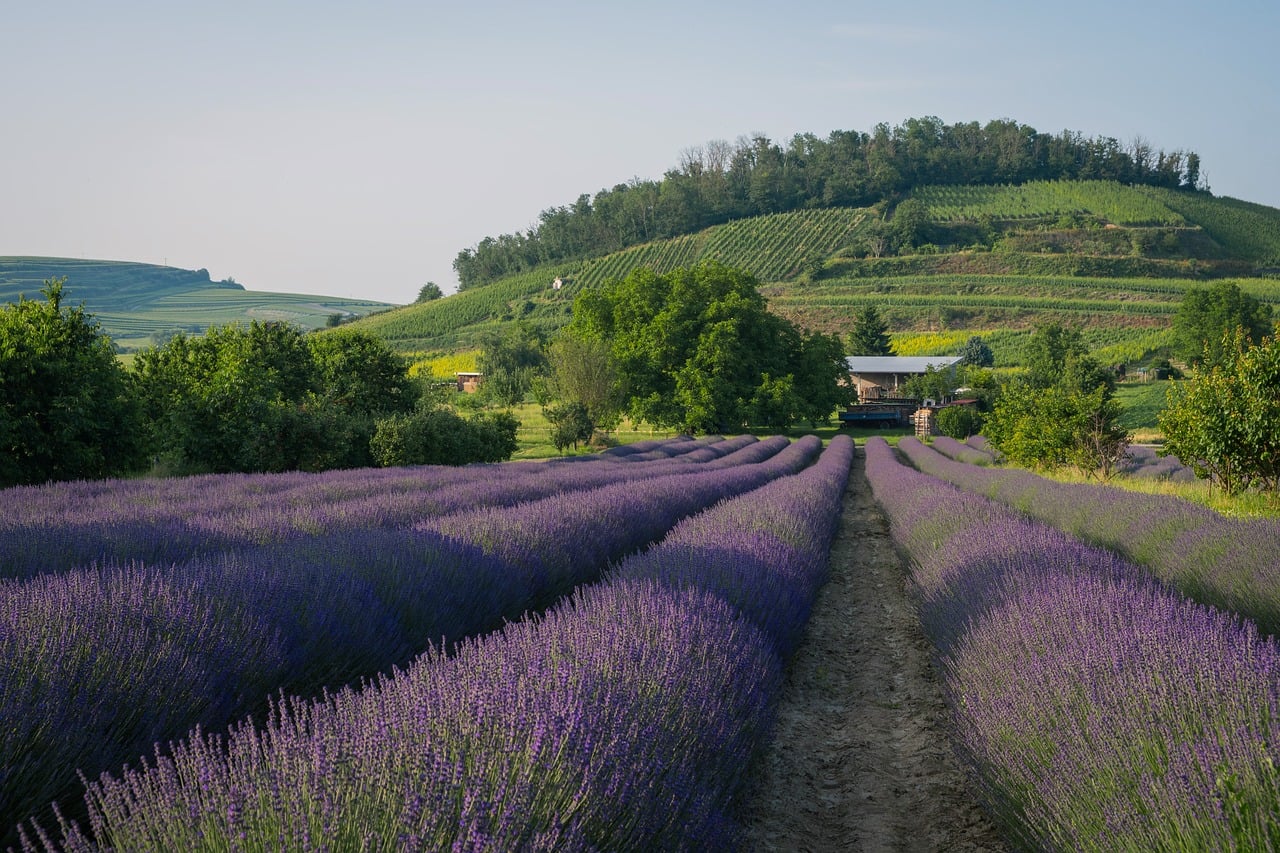
Growing Lavender at Home: From Garden Bed to Homemade Sachet
There is something quietly satisfying about harvesting a bundle of lavender that you grew yourself. The plant is generous, the scent is immediate, and the journey from seed or cutting all the way to a finished sachet is well within reach for most home gardeners. This guide walks you through every stage: choosing the right variety, preparing your soil, giving your lavender plant care it will actually respond to, and finally harvesting lavender at the right moment so your homemade sachets hold their fragrance for months.
Lavender Essential Oil
Our own Lavender Essential Oil, in sizes from 0.5 oz to bulk.
From $10.99
Shop Now →Why Lavandula angustifolia Is the One to Grow
Not every lavender sold at a garden center is the same species, and the differences matter. Lavandula angustifolia, commonly called true lavender or English lavender, is the variety most prized for its clean, sweet-floral scent and the richness of its essential oil content. Hybrid varieties such as lavandin (Lavandula x intermedia) grow taller and produce more bulk, but their camphor content is noticeably sharper. For sachets, dried arrangements, and any project where fragrance quality is the point, true lavender is the right starting place.
Popular cultivars of L. angustifolia worth looking for include 'Hidcote' (compact, deep purple, excellent oil content), 'Vera' (a classic farm variety with silver foliage), and 'Munstead' (early bloomer, hardy, ideal for cooler climates). Any of these will serve you well in the garden and give you beautifully fragrant dried stems for crafting.
What You Will Need
For Growing
- Lavender starts (nursery transplants, rooted cuttings, or seeds)
- Well-draining soil, ideally sandy or loamy with low organic matter
- Horticultural grit or coarse sand if amending heavy soil
- Slow-release, low-nitrogen granular fertilizer (optional, used sparingly)
- A sunny planting site: at least six to eight hours of direct sun daily
- Raised bed, slope, or container if your native soil holds moisture
- Watering can or drip line
- Sharp pruning shears, cleaned and disinfected
For Harvesting and Making Sachets
- Garden twine or rubber bands
- A clean, airy space for drying (not direct sun)
- Small cloth bags, muslin pouches, or squares of breathable fabric (organza, cotton voile, loose-weave linen)
- Needle and thread, or a hot-glue gun for no-sew pouches
- Ribbon or twine for finishing
- Optional: a few drops of true lavender essential oil to refresh sachets over time
Step 1: Choose Your Planting Site and Prepare the Soil
Lavender's native habitat is the rocky, sun-drenched hillsides of the Mediterranean. That background tells you almost everything about what it needs. Poor drainage is the single most common reason lavender fails in home gardens. Waterlogged roots lead to root problems, and an otherwise healthy plant can collapse in a single wet winter.
Choose the sunniest spot you have. A south- or west-facing slope is ideal. If your soil is heavy clay, do not try to work around it: raise the bed by at least 20 to 30 cm, or build a proper raised bed and fill it with a mix of topsoil, coarse horticultural grit, and a little compost (go easy on the compost; lavender does not want rich soil).
Target a soil pH between 6.5 and 7.5. Slightly alkaline is fine. If your soil tests acidic, a light application of garden lime worked in a few weeks before planting can help bring it up. Sandy or gravelly soil that drains within an hour of rainfall is the sweet spot.
Tip: Lavender grown in lean, well-drained soil produces more concentrated fragrance than lavender grown in rich, moist conditions. Counterintuitive as it sounds, do not over-amend the bed.
Step 2: Plant Your Lavender
Spring planting, once the risk of hard frost has passed, gives plants the full growing season to establish before their first winter. In mild climates, early autumn planting works well too. Avoid planting in the heat of midsummer if you can.
- Dig a hole slightly wider than the root ball and no deeper. Lavender planted too deep will rot at the crown. The top of the root ball should sit just at or slightly above soil level.
- Remove the plant from its pot and gently loosen any circling roots. If the plant is root-bound, tease the outer roots outward so they can spread.
- Set the plant in the hole and backfill with your prepared soil. Firm it in gently but do not compact the soil around the base.
- Space plants at least 45 to 60 cm apart (or follow the specific cultivar guidelines). Good airflow between plants matters. Crowded lavender is prone to fungal issues in humid climates.
- Water in once to settle the soil, then step back. New transplants need moisture to establish, but do not keep the soil wet. Water again only when the top inch or two feels dry.
Container growing is a fine option if your garden soil is simply not cooperating. Use a terracotta pot with several drainage holes (plastic pots hold moisture longer and are less forgiving), a cactus or Mediterranean blend potting mix, and place the container in full sun. Containers dry out faster, so check soil moisture regularly during hot spells, but let it dry between waterings.
Step 3: Ongoing Lavender Plant Care
Once established, lavender is one of the lower-maintenance plants you can grow. The care it needs is mostly about restraint: restraint with water, restraint with fertilizer, and restraint with the shears until the right moment.
Watering
In the first season, water young plants once or twice a week during dry spells. After the first year, established lavender is quite drought-tolerant. In most climates, natural rainfall is sufficient from autumn through spring. During summer dry periods, a deep watering once a week is usually enough. The golden rule: when in doubt, wait another day.
Fertilizing
Lavender does not need much feeding. An annual top-dressing with a little slow-release, low-nitrogen fertilizer in early spring is plenty. High-nitrogen feeds push soft, leafy growth at the expense of flowers and fragrance. Skip the rich compost mulches and opt for a gravel or grit mulch around the base instead. This keeps the crown dry, reflects heat upward, and suppresses weeds without adding nutrients.
Pruning
Annual pruning is essential for long-lived lavender plants. Without it, plants become woody from the base and eventually split open or die back in sections.
- First year: A light trim after flowering to shape the plant and remove spent blooms. Do not cut into old wood yet.
- Second year onward: In late summer, after the main flowering flush, cut back by about one-third. Leave green growth on the stems. Never cut back into bare grey wood; lavender will not reliably regenerate from old, lignified stems.
- Spring tidy: A light pass in early spring to remove any winter-damaged tips and encourage compact new growth.
Common mistake: Many gardeners either never prune their lavender (resulting in a sprawling, woody plant within three years) or cut too hard into old wood (killing the plant). Find the line where grey wood meets green shoots, and stay above it.
Step 4: Harvesting Lavender at Peak Fragrance
Timing the harvest correctly makes a real difference in how long your dried lavender holds its scent. The goal is to catch the blooms just before they are fully open.
Look for stems where roughly half the small florets on each spike have opened but the top third is still in bud. At this stage, the essential oil content in the flowers is near its peak. Once the flowers are fully open and beginning to drop petals, the oils start to volatilize off and the fragrance diminishes faster after drying.
- Harvest in the morning, after any dew has dried but before the midday heat. The volatile aromatic compounds are most concentrated in the cooler morning hours.
- Use sharp, clean shears. Crushing or tearing the stems bruises the plant tissue unnecessarily.
- Cut the stem down to just above the lowest leaves or the first set of leaf nodes on each flowering stem. Do not cut into the grey woody base.
- Gather stems into small bundles of 20 to 30 stems. Smaller bundles dry more evenly and with less risk of mold in the center.
- Secure each bundle with a rubber band rather than twine. As stems dry and shrink, rubber bands contract with them and keep the bundle tight. Twine stays loose.
A single established lavender plant can produce a surprising number of stems. A healthy 'Hidcote' plant in its third year may yield several dozen good cutting stems per season.
Step 5: Drying Your Lavender
Proper drying preserves both color and fragrance. Rushing this step with heat (an oven, for instance) degrades the volatile aromatic compounds you worked all season to develop.
- Hang bundles upside down in a cool, well-ventilated space with no direct sunlight. Direct sun fades the purple color quickly. A shaded porch, a dry shed, or an interior room with good airflow all work well.
- Allow two to four weeks for thorough drying. The stems should feel stiff and snap cleanly rather than bend. The florets should feel papery and release easily from the spike when you run your fingers down it.
- Test before crafting. Any remaining moisture in the stems will cause mold inside a sealed sachet.
Tip: If you want to preserve more of the green-grey colour in the foliage, a quick rinse of the fresh bundles before hanging (and then shaking off excess water) can help keep the leaves looking vivid as they dry. It sounds counterproductive, but dust and field debris can dull the colour over time.
Step 6: Making Your Lavender Sachet
Once your lavender is fully dry, you are ready for the most satisfying part of the whole process. These sachets are lovely tucked into linen drawers, placed in closets, or nestled in a bedside table for a gentle evening wind-down ritual. They also make genuinely thoughtful gifts. For more handcrafted gift ideas using lavender, the lavender blend recipes for homemade gifts guide is worth a look.
Simple Sewn Pouch Method
- Cut your fabric into rectangles approximately 10 x 20 cm. Fold in half to create a 10 x 10 cm pouch shape.
- Sew down two sides, leaving the top open. A simple straight stitch with a 1 cm seam allowance is all you need.
- Turn right-side out and press the seams flat if you like a tidy finish.
- Strip the dried lavender florets from the stems by running your fingers from tip to base over a clean bowl. You want loose florets, not whole stems, for the fill.
- Fill the pouch loosely, about two-thirds full. Overfilling makes the sachet stiff and less pleasant to handle.
- Fold the top edge under and stitch or hand-sew the opening closed. Add a ribbon loop if you want a hanging sachet.
No-Sew Pouch Method
Cut a 20 x 20 cm square of organza or fine muslin. Place a generous tablespoon of dried lavender florets in the center. Gather the corners up into a bundle, cinch tightly with ribbon, and tie a bow. Trim the ribbon ends at an angle for a polished look. That is genuinely all there is to it.
Refreshing your sachet over time: Dried lavender naturally releases less scent after several months. A simple way to revive a sachet is to add one or two drops of true Lavandula angustifolia essential oil directly onto the outside of the fabric. For guidance on choosing a high-quality oil for this purpose, the complete lavender DIY and blending guide covers what to look for.
Common Growing Mistakes to Avoid
| Mistake | What Happens | What to Do Instead |
|---|---|---|
| Overwatering | Root problems, plant collapse | Water deeply but infrequently; let soil dry between waterings |
| Rich or heavy soil | Lush leaves, poor flower and fragrance production | Use lean, well-drained, slightly alkaline soil |
| No annual pruning | Woody, open base; plant splits and declines | Prune by one-third after flowering each year |
| Cutting into old grey wood | No regeneration; stems die back | Always leave green growth on each stem when pruning |
| Harvesting too late | Flowers drop quickly; sachet fragrance is shorter-lived | Harvest when half the florets are open, not fully in bloom |
| Drying in sunlight | Colour fades from purple to brown | Dry in shade with good air circulation |
Expanding Your Lavender Practice
Once you have a garden bed producing well, the possibilities for using your harvest expand quickly. Dried lavender florets are a core ingredient in a simple three-ingredient lavender sugar scrub that makes a lovely addition to a morning ritual. If you enjoy working with lavender essential oil alongside your dried botanicals, room-by-room lavender oil pairing ideas can spark some creative directions for your home.
Growing lavender rewards patience. The first season, you are mostly watching a small plant settle in. By the second season, you begin to see the shape of what it will become. By the third, you are standing over a fragrant, rounded mound with more flowering stems than you know what to do with. That is a good problem to have.
A note on quality: The lavender you grow at home, dried at the right moment and stored in a cool, dark place, will often surprise you with its fragrance. True Lavandula angustifolia, grown in the right conditions, has a depth that commercial dried lavender (often harvested mechanically and dried quickly in bulk) rarely matches. Your garden is, in the most literal sense, the source.
A Few Final Tips
- Label your cultivars. If you grow more than one variety, small garden markers will save you confusion when comparing fragrance profiles at harvest time.
- Store dried florets in glass jars with tight-fitting lids if you are not using them immediately. Keep jars out of direct light. Well-stored dried lavender can hold its fragrance for 12 to 18 months.
- Take cuttings in late summer to propagate new plants for free. Softwood cuttings, 8 to 10 cm long with the lower leaves stripped, root well in a mix of perlite and multipurpose compost. Cover loosely with a clear bag to retain humidity until roots develop.
- Keep records. A simple garden journal noting planting dates, pruning dates, harvest timing, and weather conditions will help you refine your approach each year.
Growing lavender at home is a slow, sensory project. Each season adds a little more knowledge, a little more confidence, and, eventually, a windowsill lined with sachets that smell genuinely, unmistakably of the plant you tended yourself.